• Skip to primary navigation
  • Skip to main content
  • Skip to primary sidebar

Rachna cooks logo

  • Home
  • Recipes
    • Beginner Recipes
    • Vegan
    • Vegetarian
    • Rice Dishes
    • Meat/Seafood
      • Chicken
      • Fish
      • Prawn | Shrimp
    • Festival
      • Diwali
      • Navratri
    • Pickle
    • Rotis
      • parathas
  • Cookbooks
  • Contact
  • Others
    • Privacy Policy
    • Disclosure Policy
    • Health & Fitness
      • Health
      • Fitness
  • Soup
  • Salad
  • Curry
  • Dry vegetable
  • Nav Social Menu

    • Email
    • Facebook
    • Instagram
    • Pinterest
    • YouTube
menu icon
go to homepage
  • Air fryer Recipes
  • Instant Pot Recipes
  • Recipes
  • Cookbooks
  • Subscribe
    • Email
    • Facebook
    • Instagram
    • Pinterest
    • YouTube
  • subscribe
    search icon
    Homepage link
    • Air fryer Recipes
    • Instant Pot Recipes
    • Recipes
    • Cookbooks
    • Subscribe
    • Email
    • Facebook
    • Instagram
    • Pinterest
    • YouTube
  • ×
    Home » Condiment

    How to Make Ginger Garlic Paste at Home

    By Rachna Published: Feb 17, 2020 · Modified: Jul 7, 2022 Leave a Comment

    Jump to Recipe
    Buy My Air fryer ecookbooks Here
    • 23shares
    • Facebook
    • Pinterest
    • Flipboard
    • Reddit
    • 23shares

    This post details how to make ginger garlic paste at home with useful storage and preservation tips. Ginger garlic paste is commonly used in South Asian and Indian cuisine.

    If you regularly cook these cuisines, it makes sense to make your own ginger garlic paste to use in curries or otherwise.

    The recipe is pretty easy to make if you follow a few simple tricks.

    And the taste and aroma are so much better than the packaged stuff that you get in the market.

    You may also like: How to Make Tomato Puree at Home, How to make ginger garlic paste, Homemade garam masala powder and How to make coriander powder, how to make ground cumin.

    ginger garlic paste

    There really is no reason not to make ginger garlic paste at home because the process only takes about 2-5 minutes.

    Of course, peeling and chopping the ginger and garlic take a bit of time. But otherwise, making ginger garlic paste is super easy and not to be mention cheap when done at home.

    Here’s how to make ginger garlic paste at home:

    Ingredients

    1 cup chopped ginger

    1 cup chopped garlic

    2 tbsp. vegetable oil

    1 tsp. salt

    Recipe to make ginger garlic paste at home

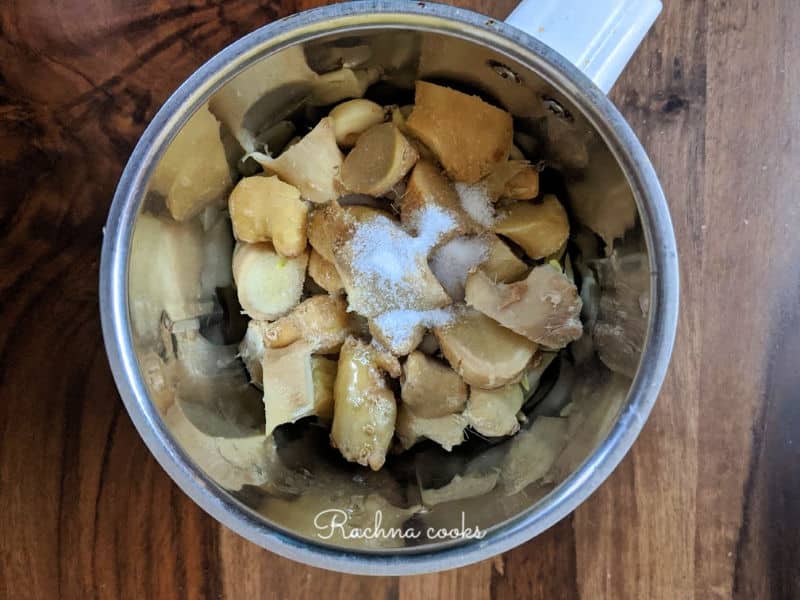
    1. Peel, wash and dry ginger and garlic thoroughly. Try to use fresh ginger and garlic.

    2. Chop them and keep aside.

    3. Add salt to chopped ginger and garlic and blend together in a blender.

    ginger garlic paste

    4. Towards the end of blending, add vegetable oil little by little to form a smooth paste.

    homemade ginger garlic paste

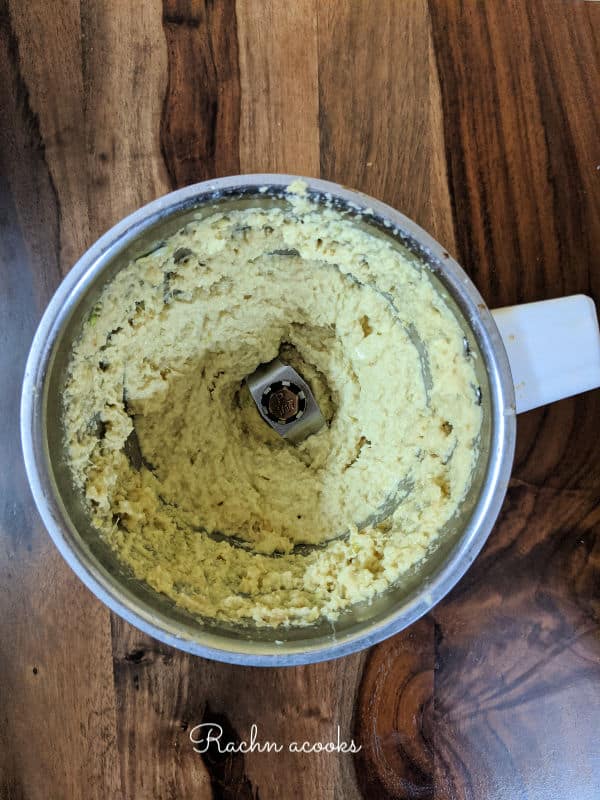
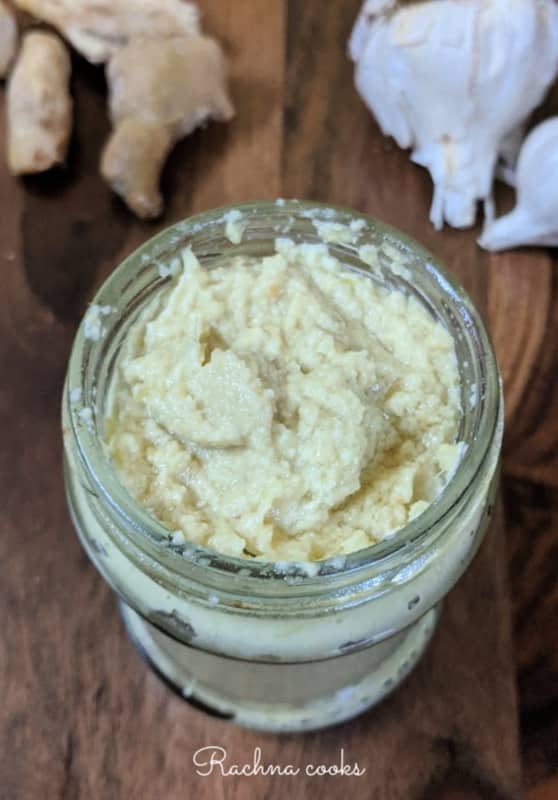
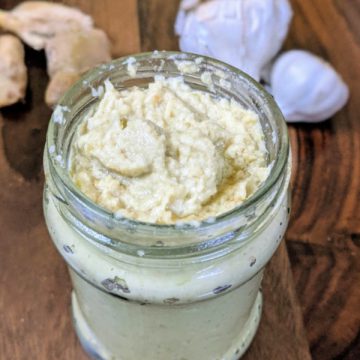
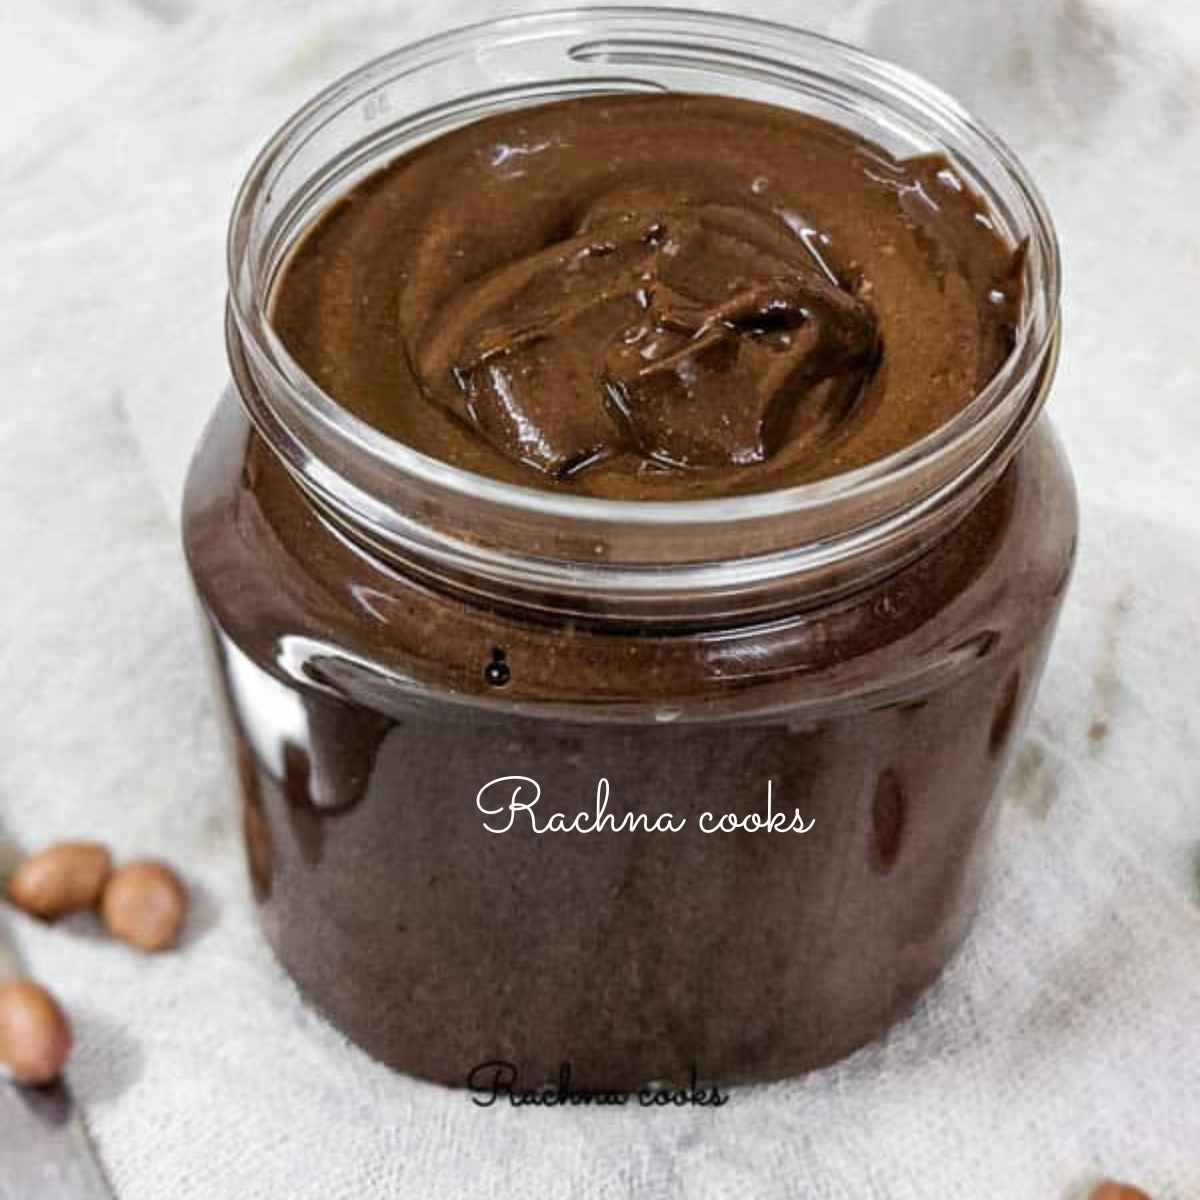
    5. Your ginger garlic paste is ready. Store in a sterilized jar and use as needed.

    ginger garlic paste

    Pro Tips:

    1. Do not use any water in the process of blending.
    2. To peel garlic easily, soak the pods in water for about 15 minutes. Make sure to dry out the cloves of garlic thoroughly after peeling.
    3. Use 2 tbsp. of oil as it helps in preserving the paste from spoiling.
    4. Only use a neutral tasting vegetable oil like sunflower, canola, corn etc.
    5. Remember to adjust the salt in your recipe as the paste has some salt.
    6. I prefer using 1:1 ratio of ginger and garlic for a balanced paste.
    7. Sterilize the jar by boiling it in hot water for about 5 minutes.
    8. Use your ginger garlic paste in your cooking. This will stay fresh for 2-4 weeks when stored in the refrigerator.

    How to Keep Your Ginger Garlic Paste Fresh

    Here are a few tips to keep your ginger garlic paste fresh:

    1. Thoroughly dry your ginger and garlic after peeling and washing. Make sure there is no water there. I keep them on a kitchen towel and let them air dry.
    2. Always use only dry spoon to take out the paste from the jar.
    3. Use sterilized glass jars for storing the paste.
    4. Use the given amount of oil and salt to help preserve the paste for longer.
    5. Always keep the ginger garlic paste refrigerated. Do not leave it out on the counter when you are cooking. Take the required quantity and keep the bottle back in the fridge immediately.
    6. It is fine if the paste goes a bit discoloured. This generally happens due to exposure to air.
    7. You can make ginger and garlic paste separately if your cooking needs them separately.
    8. Make sure that you don’t use any water while grinding the paste.

    How Long Does the Ginger Garlic Paste Last

    1. I made my bottle of paste a couple of weeks back. It is still very fresh in aroma and taste. So you can easily keep the paste in the fridge for 2 weeks to a month if you follow the above precautions.

    2. If you freeze the paste in case you have made a large batch, it can last you for upto six months when kept in the freezer.

    If you like this recipe of homemade ginger garlic paste with tips, do leave a * star rating either on the recipe card or in the comments. Thanks.

    Do make this paste and use in your cooking. Share with me your experience in the comments.

    Here's the recipe card:

    📖 Recipe Card

    ginger garlic paste

    Homemade Ginger Garlic Paste

    Rachna Parmar
    This post gives simple method to make your own fresh and economical ginger garlic paste at home that lasts for weeks. Follow my easy method and tips.
    4.75 from 4 votes
    Print Recipe Pin Recipe Save Recipe Saved Recipe
    Prep Time 15 minutes mins
    Total Time 15 minutes mins
    Course Condiment, Paste
    Cuisine Indian
    Servings 2 cups
    Calories 267 kcal
    cups

    Equipment

    • Blender

    Ingredients
     

    • 1 cup chopped ginger
    • 1 cup chopped garlic
    • 2 tbsp. vegetable oil
    • 1 tsp. salt

    Do you want to save this recipe?

    Enter your email below & we’ll send it straight to your inbox. Plus you’ll get more great recipes and tips from us each week!

    Invalid email address. Please enter again.

    Awesome! Check your email for your saved recipe.

    Instructions
     

    • Peel, wash and dry ginger and garlic thoroughly. Try to use fresh ginger and garlic.
    • Chop them and keep aside.
    • Add salt to chopped ginger and garlic and blend together in a blender.
    • Towards the end of blending, add vegetable oil little by little to form a smooth paste.
    • Your ginger garlic paste is ready. Store in a sterilized jar and use as needed.

    Notes

    1. Do not use any water in the process of blending.
    2. To peel garlic easily, soak the pods in water for about 15 minutes. Make sure to dry out the cloves of garlic thoroughly after peeling.
    3. Use 2 tbsp. of oil as it helps in preserving the paste from spoiling.
    4. Only use a neutral tasting vegetable oil like sunflower, canola, corn etc.
    5. Remember to adjust the salt in your recipe as the paste has some salt.
    6. I prefer using 1:1 ratio of ginger and garlic for a balanced paste.
    7. Sterilize the jar by boiling it in hot water for about 5 minutes.
    8. Use your ginger garlic paste in your cooking. This will stay fresh for 2-4 weeks when stored in the refrigerator.

    Nutrition

    Calories: 267kcalCarbohydrates: 31gProtein: 5gFat: 15gSaturated Fat: 12gSodium: 973mgPotassium: 472mgFiber: 2gSugar: 1gVitamin C: 24mgCalcium: 131mgIron: 1mg
    Tried this recipe?Let me know on Instagram @rachna.parmar or tag #rachnacooks
    Check out our Food videos Subscribe to our Food channel for recipe videos
    • 23shares
    • Facebook
    • Pinterest
    • Flipboard
    • Reddit

    More Condiment

    • Indian mint chutney in a bowl
      Indian Mint Sauce
    • a jar of brown shiny chocolate peanut butter on a white background
      How to make Homemade Chocolate Peanut Butter
    • Bhuna Masala Recipe | Indian Curry Paste
    • How to Make Homemade Tomato Puree (Step-by-step Recipe)

    Reader Interactions

    Comments

    No Comments

    4.75 from 4 votes (4 ratings without comment)

    Leave a Reply Cancel reply

    Your email address will not be published. Required fields are marked *

    Recipe Rating


    Primary Sidebar

    Hi and welcome!

    I am Rachna, a Certified Nutritionist and Health Coach. I help you eat healthy. I specialize in healthy recipes especially Air fryer recipes.

    I offer Health and Nutrition Coaching aimed at helping you achieve fat loss, healthy eating habits and more stamina and flexibility.

    More about me →

    HEALTHY RECIPES

    • 3 air fried corn on the cob on a white plate.
      Air fryer Corn on the Cob
    • Air fryer Mushrooms
    • Air fryer beet chips on a white plate
      Air fryer Beet Chips
    • Close up of air fried chickpeas in a bowl
      Air fryer Chickpeas
    • Delicious roasted zucchini in a white plate
      Air fryer Zucchini No Breading
    • a bowl of roasted peanuts in air fryer with a spicy coating.
      Air fryer Peanuts

    LATEST RECIPES

    • 7 idlis after steaming on a white plate.
      Quinoa Idli Recipe
    • Kothimbir vadi served on a white plate.
      Air Fryer Kothimbir Vadi
    • Indian cucumber salad served on a white plate.
      Indian Cucumber Salad or Kakdi Chi Koshimbir
    • Close up of sprouted moong pakode on a plate
      Air Fryer Whole Moong Pakode
    • Close up of Gobi 65 on a plate
      Air fryer Gobi 65 | Cauliflower 65
    • Close up of delicious roasted baby potatoes in air fryer
      10 Air Fryer Recipes You’ll Never Get Tired Of!

    Footer

    ↑ back to top

    POLICIES

    • Privacy Policy
    • Disclaimer
    • Accessibility Policy

    NEWSLETTER

    • Sign Up for emails and updates

    ABOUT

    • About
    • Contact
    • Media Kit

    As an Amazon Associate I earn from qualifying purchases. This blog earns income from affiliate links and ads.

    Copyright © Rachna cooks 2025

    Rate This Recipe

    Your vote:


    A rating is required
    A name is required
    An email is required

    Recipe Ratings without Comment

    Something went wrong. Please try again.