
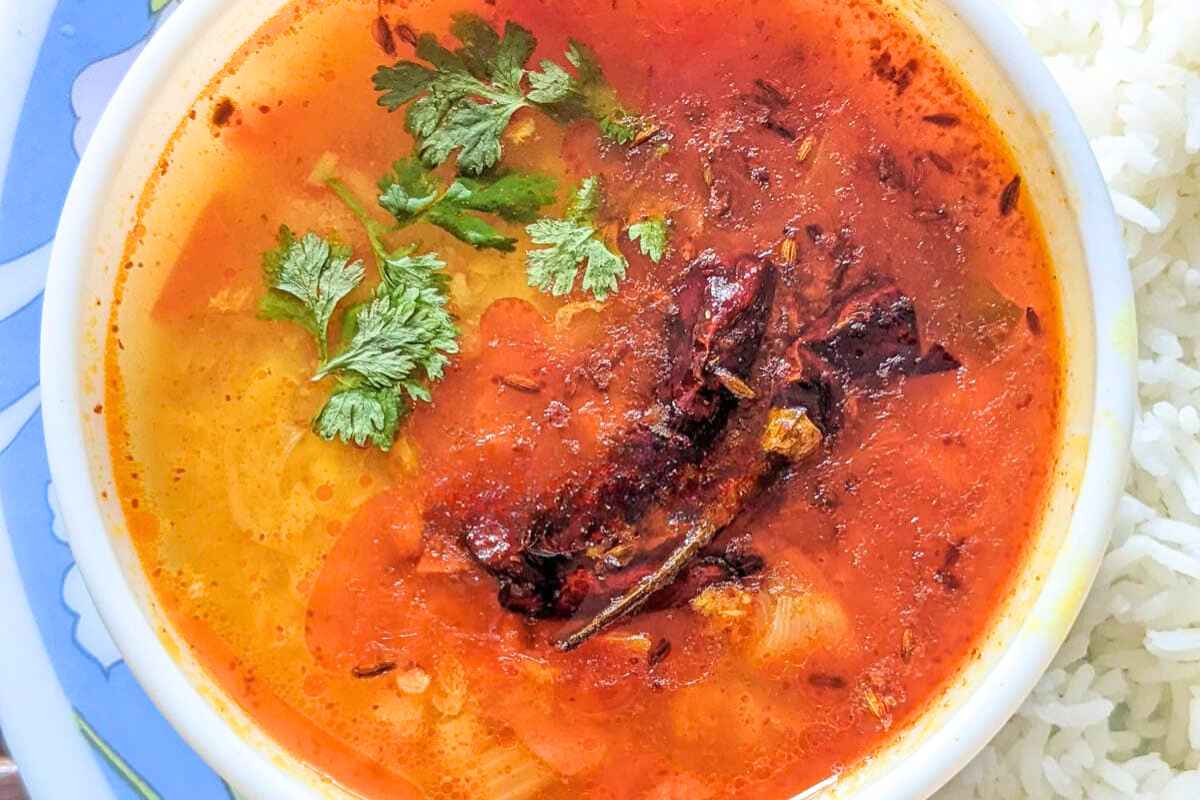
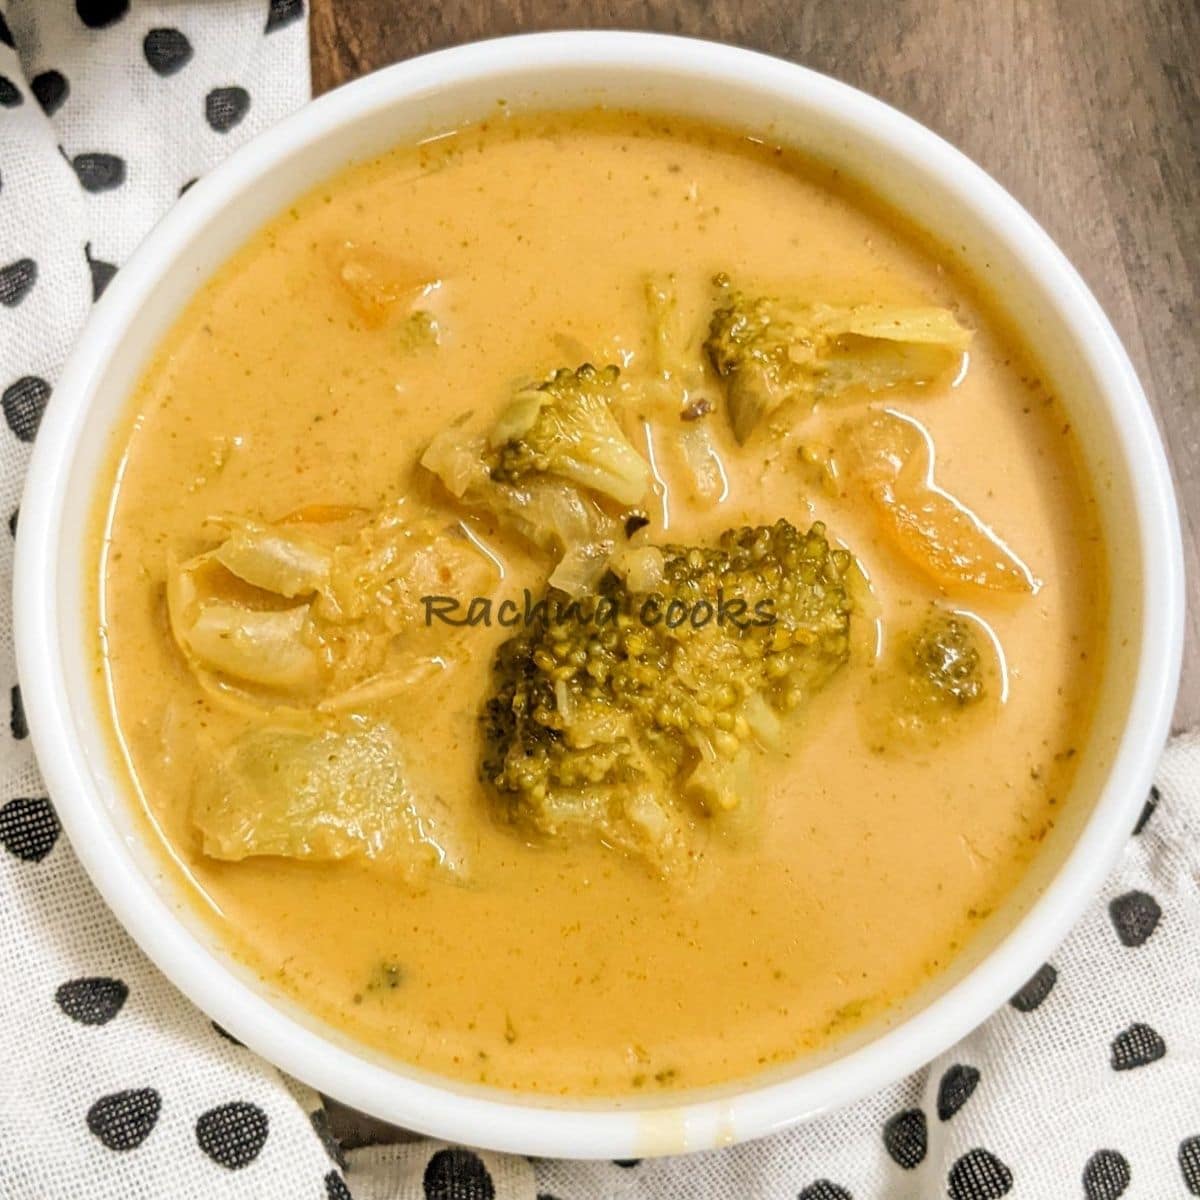
Toor Dal or Split Pigeon Peas are the yellow lentils that are cooked very regularly in Indian cuisine. Pair it with rice or rotis and you have a delicious hearty meal at hand.
This yellow dal also known as arhar dal is a staple of Indian meals. I make it at least 2-3 times every week in my home.
Earlier I used manual pressure cooker but with instant pot, the process is supervision free and easier.
I always prefer ghee tadkas or tempering with my dal. But for dairy free options, use any vegetable oil of choice.
You may also like: Dal palak, Instant Pot veg pulao, Instant pot Kheer
Tips to Make Best Toor Dal
1. This dal can be made very basic by just boiling the lentils with turmeric and salt and tempering it at the end.
2. Adding chopped onion, ginger, garlic and tomatoes makes the dal much more flavorful.
You could choose to fry these in oil and then add dal and cook them together.
3. I normally prefer to use less oil in my cooking.
Hence I just add the chopped onions, garlic, ginger, green chillies and tomatoes along with the dal and cooking them together. Faster, healthier and delicious.
4. Washing and soaking the dal helps in faster cooking.
But most times I don’t have the time to do that and cook it right away.
5. I prefer my dal to be well mashed and slightly thin. You can make it thicker by reducing the quantity of water used.
6. Also doing a quick tadka or tempering on the stove top is much faster.
But if you want it to be completely instant pot, then just do the tempering after you remove the cooked dal and add it to it when serving.
7. You can add leafy greens and other vegetables to up the nutritious value of dal.
These are best added to cooked dal and then cooked. Else they get overcooked and mushy.
8. Garnish with lemon juice and chopped cilantro.
9. Ghee really adds a lot of flavor to this dal. But feel free to use vegetable oil of choice for dairy free version.
I have used 2 tsp. of ghee, if you want lesser fat, use only about 1 tsp. to temper the spices.
How to Serve Dal Tadka
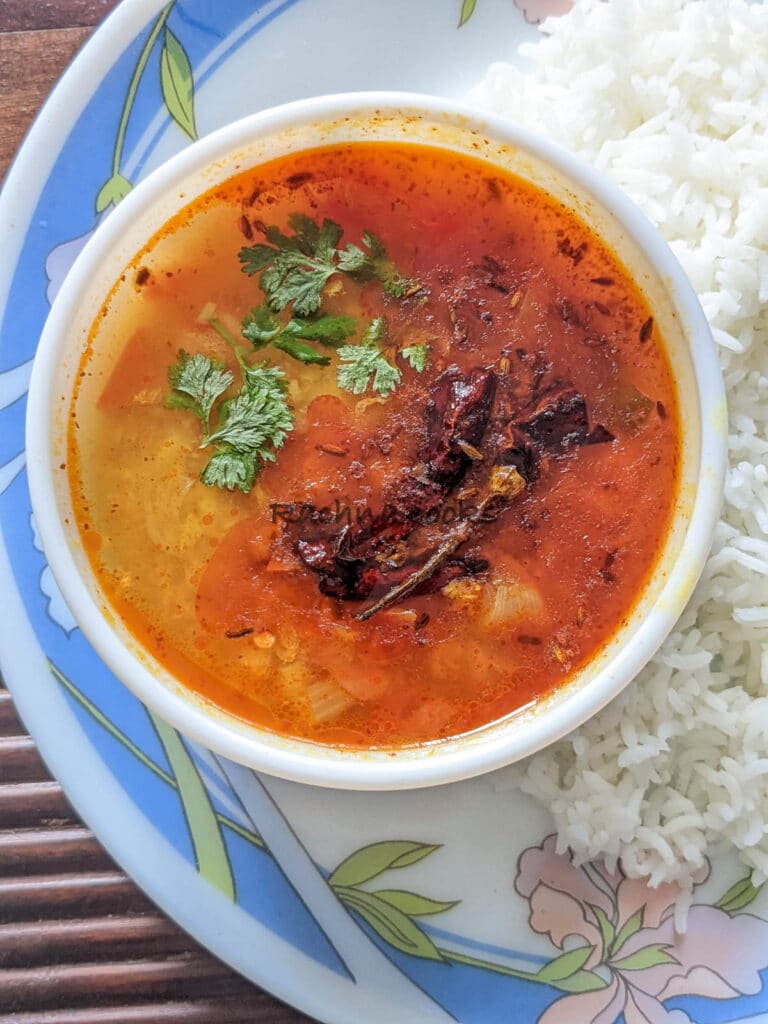
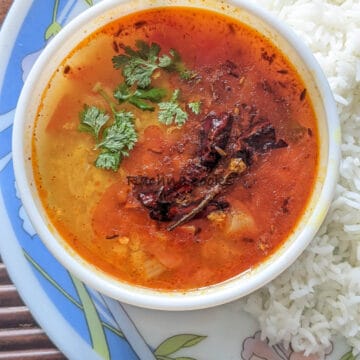
Serve it with a side of boiled rice or rotis and a dry vegetable like jeera aloo, methi aloo or aloo capsicum.
Just plain boiled rice with dal is a complete meal by itself and super easy to make quickly.
Have some salad and homemade curd on the side for a delicious, simple Indian meal.
Storage:
1. You can boil larger batches of toor dal and refrigerate in the fridge. Then whenever you need it, take a small portion heat it and temper it. You will have delicious dal ready in minutes.
2. You can also freeze prepared dal in serving size for up to 4 weeks.
3. Do not add tempering or tadka if you are planning to store dal.
4. Leftovers stay in the fridge for up to 2 days. Heat it and give it a fresh tadka for that fresh taste.
Stepwise Pictures
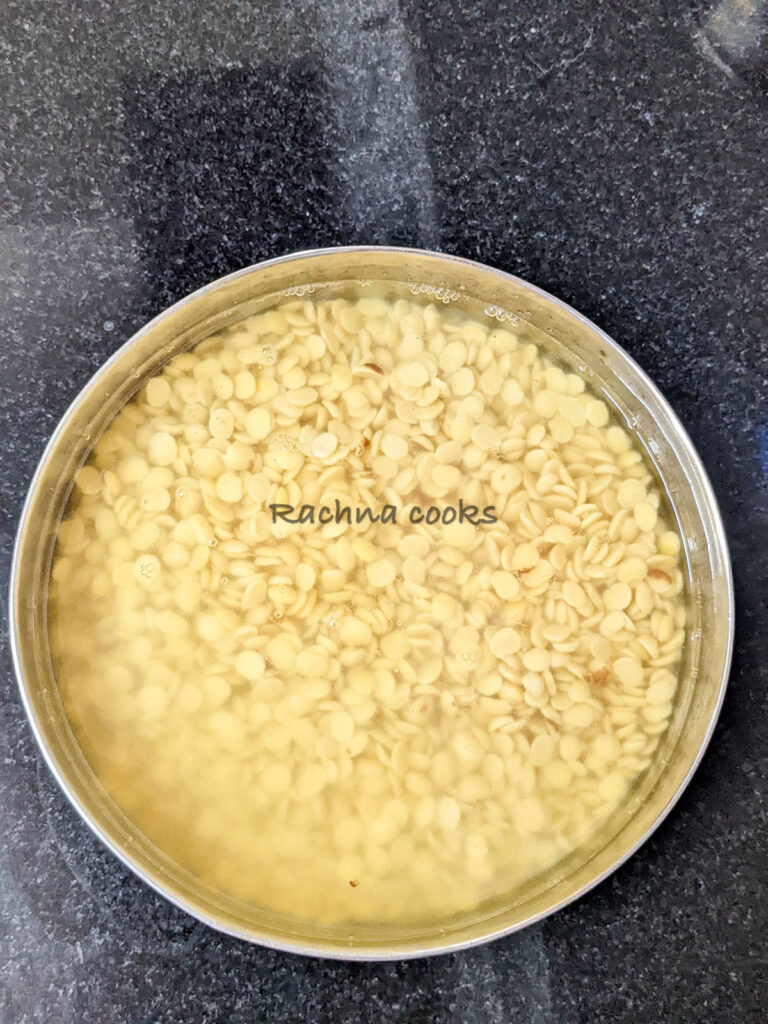
Wash and soak 1 cup toor dal in water for 15-30 minutes. If you don’t have time to soak, you can wash and use right away. Just increase pressure cooking time by 1 minute.
Slice 1 small onion. Chop 1 medium tomato. Chop 2 green chillies (optional).
Add washed toor dal to Instant Pot.
Add onion, tomato, green chillies and 1 tsp. ginger garlic paste. Add ½ tsp. turmeric powder and 1 tsp. salt.
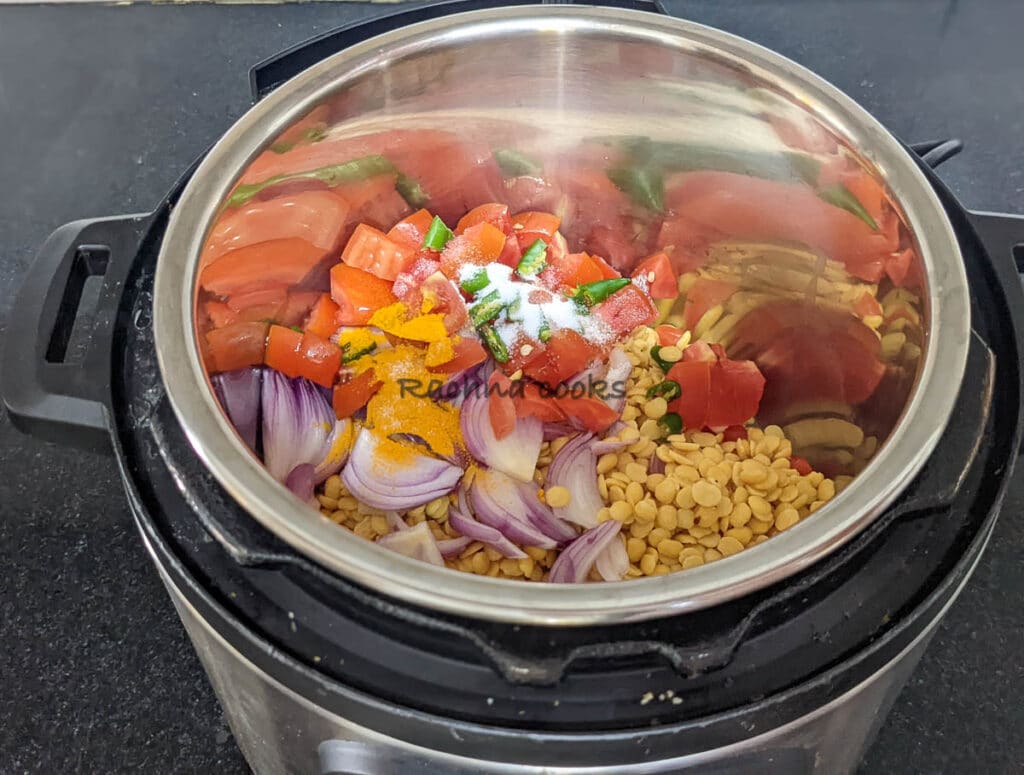
Add 3 cups water and close the lid.
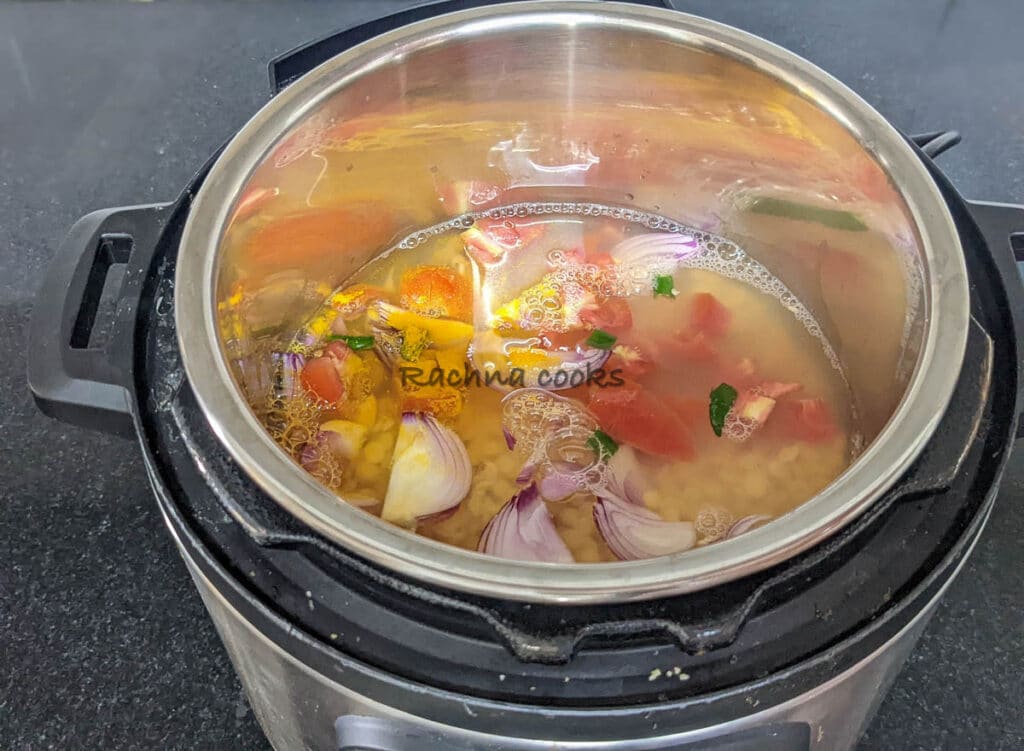
Set pressure cooking time to 9 minutes. Once the timer beeps, let the pressure release naturally (NPR) for 6 minutes.
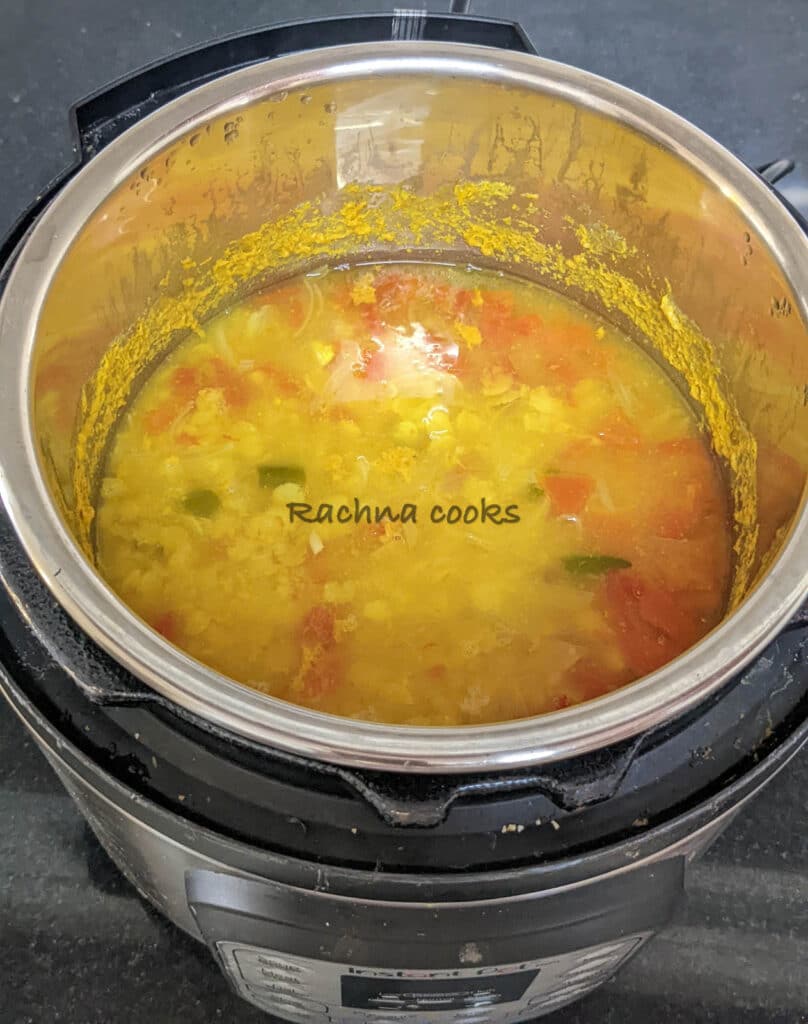
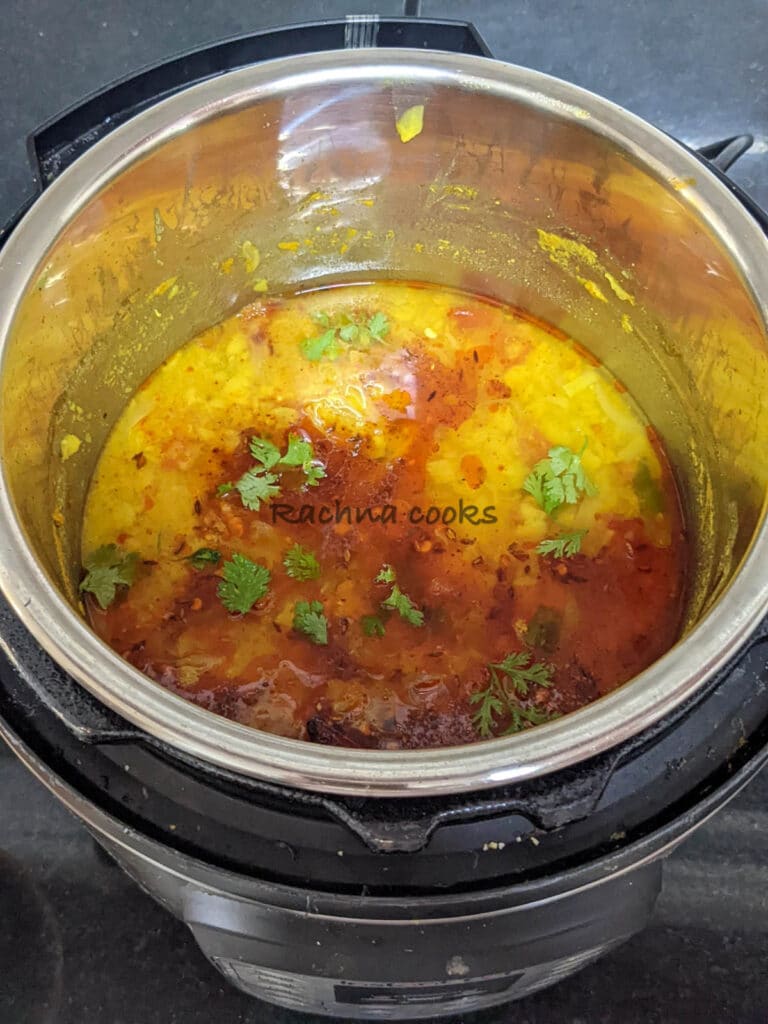
Then open vent and release pressure manually. and mix dal. It will be nice and cooked.
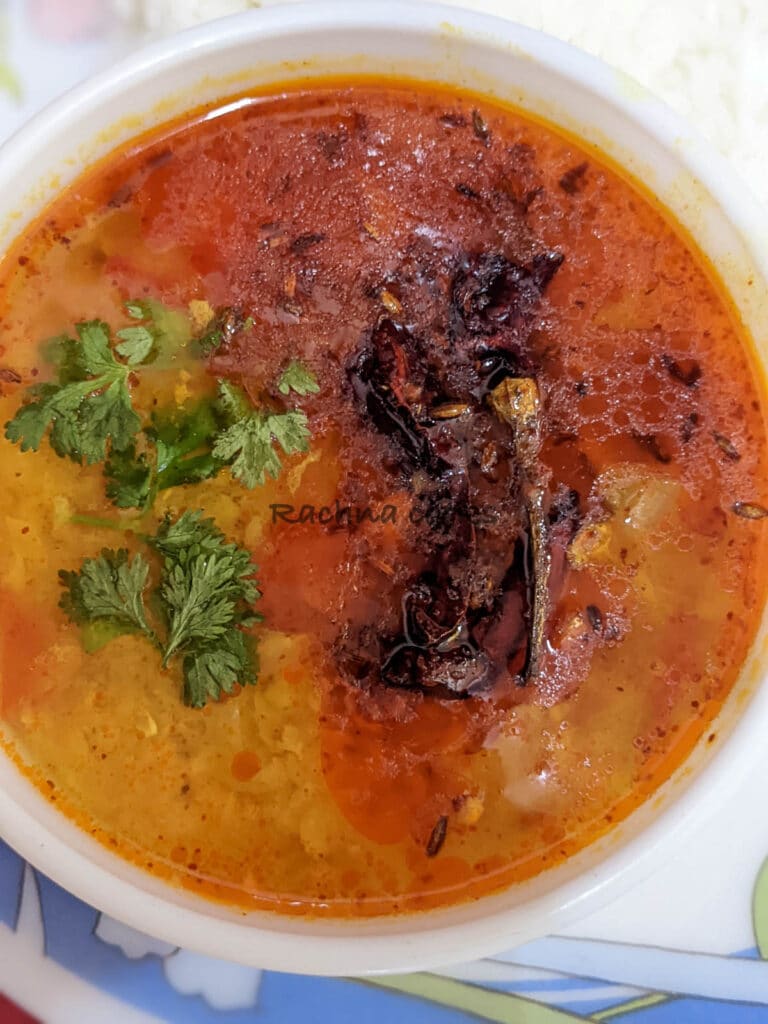
You can mash it lightly with the ladle.
Tempering:
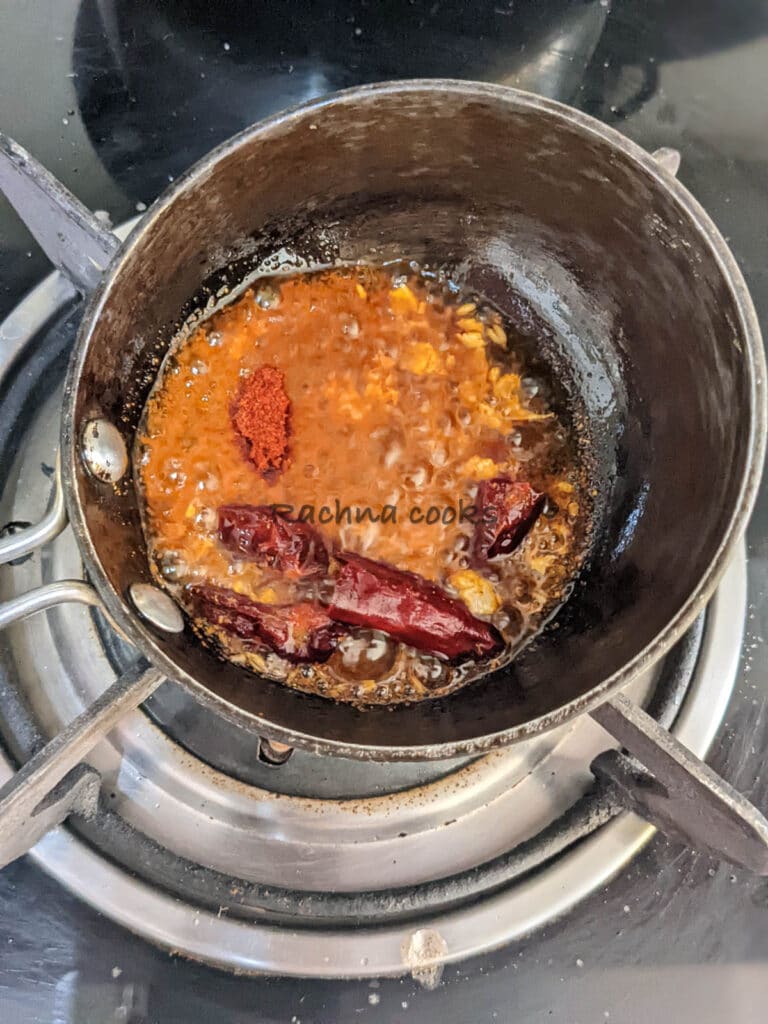
Take 2 tsp. ghee or vegetable oil in a small pan. Heat it. Add 1 tsp. cumin seeds. Let them sputter for 30 seconds.
Add 1 finely chopped garlic clove, 1 pinch asafoetida, 2 dry red chillies broken into halves. Fry for 30 seconds.
Then add ½ tsp. cayenne or paprika. Turn off the gas. Add to the dal and serve hot after garnishing with chopped cilantro and lime juice.
You can do the same tempering in instant pot by emptying the cooked dal and using the insert pan after washing it.
Set IP on saute mode to prepare tempering. Follow the instructions for stove top. Prepare tempering and add to the prepared dal.
The same can be done in microwave by adding all the spices and microwaving for about 30 seconds to 1 minute.
Garnish with chopped cilantro and lemon juice.
Serving: Serve hot with boiled rice and a cucumber tomato salad. You can store the leftovers in the fridge for up to 2 days.
You can also freeze and store for longer period of up to 4 weeks.
If you want to boil daal as meal prep, then don't do the tempering.
Boil a larger quantity and refrigerate/freeze. That way you can make fresh dal in a jiffy by thawing and tempering the dal.

Time taken: Do remember that the recipe given is for soaked yellow lentils. If you do not soak then increase pressure cooking time for 1 minute.
Remember that the instant pot takes a few minutes to come to pressure. For my IP DuoMini of 3 qt. it took about 6 minutes.
It will be different depending upon the size of your model.
Also you can reduce the quantity of water used to 2 cups in case you want thick dal.
Here
Instant Pot Toor Dal
Equipment
Ingredients
- 1 cup toor dal or split pigeon peas washed and soaked in water
- 1 small onion sliced
- 1 tomato chopped
- 2 green chillies chopped optional
- 1 tsp. ginger garlic paste or minced
- ½ tsp. turmeric powder
- 1 pinch heeng or asafetida
- 3 cups water
Tempering:
- 2 tsp. ghee or vegetable oil of choice
- 1 tsp. chopped garlic
- 2 dry red chillies
- 1 tsp. cumin seeds
- ½ tsp. chilli powder or cayenne Use paprika if you want lesser heat.
Do you want to save this recipe?
Enter your email below & we’ll send it straight to your inbox. Plus you’ll get more great recipes and tips from us each week!
Instructions
- Wash and soak 1 cup toor dal in water for 15-30 minutes. If you don’t have time to soak, you can wash and use right away. Just increase pressure cooking time by 1 minute.
- Slice 1 small onion. Chop 1 medium tomato. Chop 2 green chillies (optional).
- Add toor dal to Instant Pot. Add onion, tomato, green chillies and 1 tsp. ginger garlic paste. Add ½ tsp. turmeric powder and 1 tsp. salt.
- Add 3 cups water and close the lid.
- Set pressure cooking time to 9 minutes. Once the timer beeps, let it release naturally for 6 minutes. Then release steam and mix the dal. It will be nice and cooked.
Tempering:
- Take 2 tsp. ghee or vegetable oil in a small pan. Heat it. Add 1 tsp. cumin seeds. Let them sputter for 30 seconds.
- Add 1 finely chopped garlic clove, 1 pinch asafoetida, 2 dry red chillies broken into halves. Fry for 30 seconds.
- Then add ½ tsp. cayenne or paprika. Turn off the gas. Add to the dal and serve hot after garnishing with chopped cilantro and lime juice.
- You can do the same tempering in instant pot by emptying the dal and using the same pan after washing it on saute mode to prepare tempering.
- Follow the stove top method to prepare tempering. Add the tempering to the dal.
- The same can be done in microwave by adding all the spices and microwaving for about 30 seconds to 1 minute.
- Serving: Serve hot with boiled rice and a cucumber tomato salad. You can store the leftovers in the fridge for up to 2 days.
- You can also freeze and store for longer period up to 2 months.
- If you want to boil daal as meal prep, then don't do the tempering. Boil a larger quantity and refrigerate/freeze. That way you can make fresh dal in a jiffy by thawing and tempering the dal.
- Time taken: Do remember that the recipe given is for soaked yellow lentils. If you do not soak then increase pressure cooking time for 1 minute.
- Remember that the instant pot takes a few minutes to come to pressure. For my DuoMini of 3 qt. it took about 6 minutes. It will be different depending upon the size of your model.
- Also you can reduce the quantity of water used to 2.5 cups in case you want thick dal.
Notes
2. Adding chopped onion, ginger, garlic and tomatoes makes the dal much more flavorful. You could choose to fry these in oil and then add dal and cook them together.
3. I normally prefer to use less oil in my cooking. Hence I just add the chopped onions, garlic, ginger, green chillies and tomatoes along with the dal and cooking them together. Faster, healthier and delicious.
4. Washing and soaking the dal helps in faster cooking. But most times I don’t have the time to do that and cook it right away.
5. I prefer my dal to be well mashed and slightly thin. You can make it thicker by reducing the quantity of water used.
6. Also doing a quick tadka or tempering on the stove top is much faster. But if you want it to be completely instant pot, then just do the tempering after you remove the cooked dal and add it to it when serving.
7. You can add leafy greens and other vegetables to up the nutritious value of dal. These are best added to cooked dal and then cooked. Else they get overcooked and mushy.
8. Garnish with lemon juice and chopped cilantro.
9. Ghee really adds a lot of flavor to this dal. But feel free to use vegetable oil of choice for dairy free version. I have used 2 tsp. of ghee, if you want lesser fat, use only about 1 tsp. to temper the spices.
Nutrition
If you liked the recipe, I request you to leave a star * rating. Thanks.

Leave a Reply